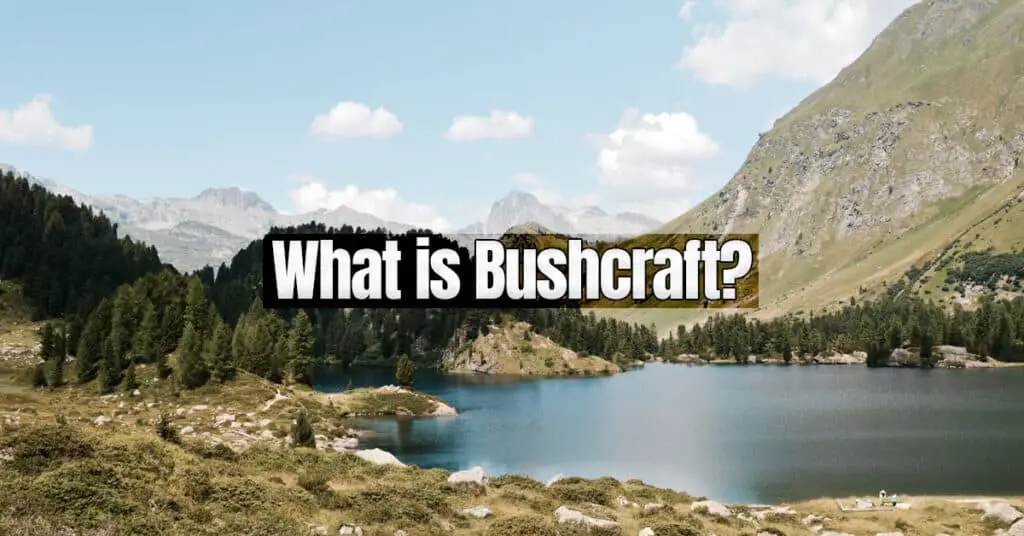
When you first gain interest in the world of bushcraft, you usually have very similar questions to everyone else. Where should I start? And what’s the best way to learn bushcraft?.
Don’t worry, I had the same questions when I was a just getting started in the world of bushcraft as well. So naturally, I have the answers to your questions! Let’s find out how to get started with bushcraft for beginners.
Point-blank, the best way to get introduced to the world of bushcraft as a beginner is to go camping on crown, public or open access land.
It’s okay to start out learning the basics with the safety net of some comfort ammenities. Not everyone has to start out by wandering into the bush with just a knife and compass. We aren’t born with an expert knowledge of primitive skills, we have to learn them.
Bring a bushcraft book with you and just try things out that you learn from it.
When camping you can practice the main bushcraft skills;
- Shelter building
- Fire building
- Cooking over a fire
- Water procurement
- Food foraging
Camping is as close to a bushcraft experience as you can get when you are first starting out and offers a much-needed safety net in case things don’t go as planned.
Let’s get you started with some bushcraft projects that can enhance your wilderness skills, which are suitable for beginners!
Bushcraft Projects for Beginners
Before we get started, if you are wondering where you can practice bushcraft legally, view this post. Now, it can be a very daunting task when looking to start your first bushcraft project. There are so many things to do, where are you supposed to start? Let’s take a look at some great bushcraft projects for beginners.
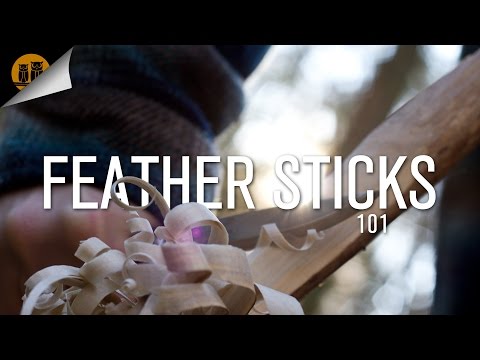
Feather Sticks
A feather stick is a piece of wood that you shave down to produce a cluster of little shaving curls hanging from the wood. This is an important bushcraft fire starting tool, it will allow for wet or damp wood to be used to get a fire going when dry tinder is scarce.
Feather sticks are great for when it’s windy out, you have your fire-starting fuel (feather shavings) attached to your piece of wood, and do not need to worry about them blowing away.
They also work wonderfully inside your bushcraft stove The ability to create good feather sticks and shavings is a very important bushcraft skill to know. A pile of carefully created feather sticks will be the difference between being cold and wet at night, or warm and dry.
You want your shavings to be curly and thin, the thinness is what makes it ignite easier, while the curls allow for proper airflow. The quality and shape of your feather stick is vital, thus you need to practice this skill to be proficient.
Also, keep in mind, In order to make proper feather sticks you need a sharp bushcraft knife or the shavings simply will not be thin enough. Be sure to create enough feather sticks to get a fire going, the more you make the more likely you will have success starting a fire.
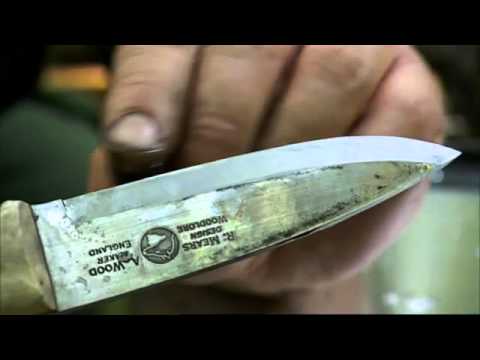
Bushcraft Knife sharpening
Now, this may not sound like a bushcraft skill or even like a lot of fun, but trust me, when in the bush the last thing you want is a dull knife. In a survival situation, taking care of your tools and making sure they maintain an edge could be the difference between a wonderful trip or a miserable experience. It is imperative that you always keep your bushcraft knives sharp.
More often than not, you will find yourself needing to sharpen your knife out in the bush, so it is important you know how to properly do so. Like many things, practice makes perfect, and sharpening your bushcraft knife is no different.
To sharpen your knife in the bush, you will need a small sharpening stone, one that fits easily into your bushcraft backpack and won’t weigh you down.
If you have ever sharpened a knife or tool at home, it’s no different from that. Place the sharpening stone against your knife so that the bevel of the knife is flat up against it. Proceed to move the sharpening stone in a circular motion on the knife blade. It’s important you switch sides and sharpen both sides equally.
This video by Ray Mears, a bushcraft legend, will get you going in the right direction.
Setting Up a Tarp Shelter
Shelter building is the most important aspect of bushcraft if you ask me. You need to have an area that gets you out of the elements and keeps you both safe and dry at night. Having a shelter to crawl into when needed gives you an extra mental boost during the day when you are out in the bush.
A tarp shelter is the most basic form of bushcraft shelter that you could possibly make. Tarp shelters are lightweight, waterproof (if made correctly), and very easy to pack in your bushcraft backpack.
The best part about making a tarp shelter is that there are endless possibilities as to how you can construct one! Tactical.com actually has a great article showing 26 different tarp configurations, Knowing how to make a proper tarp shelter is something you must teach yourself how to do when starting out in bushcraft.
Bushcraft knots
Another critical skill and bushcraft project you can work on is knot tying. Knot tying is an essential skill you must learn. There are many knots used for bushcraft. It’s good to know numerous knots, but you’ll often only find yourself using 5 or so knots, dependent on the situation. These are the 5 bushcraft knots you should know.
- Figure 8 on a bight
- Sheet Bend
- Taut-Line Hitch
- Two Half Hitches
- Clove Hitch
The best way to practice these knots at home is with paracord, one of the more useful items you should always have in your bushcraft kit. You want to be able to know these knots by heart so that in a tense situation like setting up a tarp shelter in a storm, you will not hesitate and get the job done faster.
Remember, practice makes perfect, so never stop working on your knots. An improperly tied knot can result in a multitude of disasters.
What do I need for bushcraft?
You may watch youtube videos online when first getting into bushcraft where people head out into the bush with hundreds, sometimes thousands of dollars worth of bushcraft gear. But it isn’t all entirely necceesary.
If you’re interested in practicing bushcraft you will need the following items:
- Knife
- Axe
- Paracord
- Tarp
- Lighter
- Firesteel
- Headlamp
- Backpack
- Sleeping bag
- Pot
- Utensils
- Water purifier / bottle
- Toiletry kit
- First aid kit
- Compass
These items are all neccesary if you are planning a muti-day trip into the wilderness and can be had for relatively cheap. Even if you are only going out for the day, it’s a good idea to carry all your gear to get used to the weight.
Beginner Bushcraft Kit list explained
Everyone has this grand illusion that when you are starting out you just have to go out and spend hundreds of dollars on bushcraft gear, and that’s simply not true.
There is a saying we see come to fruition quite a lot in the bushcraft world “all the gear, no idea”, everyone is so eager to get going they go out and spend hundreds sometimes even thousands on new gear they have no idea how to use. It’s very important you learn before investing heavily.
However, you will need a few pieces of basic bushcraft gear as part of your beginner bushcraft kit, but it doesn’t have to break the bank. Let’s take a look at what you need to get started.
Knife
The main piece of gear everyone needs is a bushcraft knife. You will find after time that your most used tool in the bush is your knife as it has so many uses; batoning wood, carving, chopping, creating feather sticks, fire starting with a ferro rod, etc.
When you are just getting started, however, you don’t need to spend up on one of the best bushcraft knives on the market. That would be like learning how to drive and then buying a Ferrari. Ok, maybe that was a bad example, but you get what I mean.
Any relatively cheap knife will do the job for beginners. For me personally, a knife I started out with and actually still use quite often is the Morakniv Garberg, it’s a cheap but high-quality knife that will last you a very long time. It will hold up against anything you put it through in the bush.
Axe
Possibly the second most useful piece of gear is an axe, or hatchet. A solid bushcraft axe will be another daily use tool for you, whether is be felling trees for your beginner bushcraft projects or bucking wood for fires there is no doubt if you are getting into bushcraft, you will want an axe.
Like I previously stated with the bushcraft knives, you don’t need to go out and spend hundreds of dollars on a top of the line axe when you are just getting started in bushcraft. You can pick up a quality cheap bushcraft axe for under $100 on Amazon, this Marbles camp axe (hatchet) comes in at about $40 and is more than capable of completing any jobs a bushcraft beginner would be looking to take on.
Paracord
Probably the most versatile item you can have in your beginner bushcraft kit is some good bushcraft paracord. Paracord has many uses in the bush, including:
- Bow Drill cordage
- Shelter building
- Snares for animal trapping
- Fishing line
- Repairing equipment
- Stringing up tarps
and so much more. You may be asking how would you use bulky paracord for fishing line? Well, the cool thing is you can actually remove the inner strands of the paracord which gives you thin pieces of string resembling fishing line, those thin pieces can even be used for sewing your equipment back together if it rips. Like I said, versatile!
Paracord is also what you should be using to learn your bushcraft knots, as previously talked about in this post. Paracord isn’t relatively expensive either, which is good.
Tarp for Shelter
The first bushcraft shelter you ever make should be a bushcraft tarp shelter for the simple fact that they are easiest to set up and work great to keep you dry and out of the elements.
Tarps are easy to pitch and are very lightweight in your backpack which beats the heck out of lugging around a large tent for miles, trust me. Tarps are also a lot more flexible than a tent and are easily adjusted to suit your situation.
A solid high-quality tarp will run you anywhere from $50-$100 depending on the size, which isn’t bad considering a good quality tarp will last you for years. I personally have been using my aqua quest defender tarp for over 3 years with no issues at all, it’s really the ideal tarp for bushcraft.
Lighter
Lighters are an essential tool to have in your bushcraft kit, it’s a tried and true reliable way of making fire and in the bush fire is key to survival.
Firesteel
Along with your lighter, a fire steel makes a great fire starter. Especially in conditions where a lighter may falter, like in the wind or rain.
It’s always smart to bring both a lighter and a firesteel, not just one or the other.
Headlamp
Headlamps are good to have with you because it gets very very dark out in the wilderness at night, not only does it offer you a sense of securitiy, being able to see a few meters out into the distance but it will also save you from tripping over things and potentially hurting yourself.
Backpack
Of course, you are going to need a backpack or ruckscak for bushcraft. You need somewhere to hold all your gear. Your backpack needs to be strong and durable as it holds all the items that are essential to keeping you going in the bush.
Sleeping bag
Some people enjoy making beds out of spruce tree boughs or moss, and don’t get me wrong they can be mighty comfortable, but it’s always nice to have a sleeping bag for the mental side of things. Knowing no matter where you stop to set up bush camp, you will be warm.
Pot
Gotta eat! But not only can a billy pot be used for cooking you can use it to collect water and purify it over a fire if you find the need.
Utensils
Sure you can carve up a spoon or some chop sticks to eat in a pinch but it’s always handy to carry some utensils for eating with. I always have a spork with me.
Water purifier / bottle
As humans we rely on water to live, if you run out of water you will soon perish. Carrying a water bottle as well as a means to purify water is MANDATORY when out in the wilderness. If you don’t know much about purifiying water check out this post.
Toiletry kit
Everyone has to go. Keep things in a small bag like wet wipes, toilet paper, tooth brush etc.
First aid kit
Accidents happen, you need to be prepared for that inevitability. Check out this post for a more detailed look at a bushcraft first aid kit.
Compass
Knowing how to navigate when you get turned around in a dense forest is key. Having a compass on hand has saved me numerous times.
Conclusion
I hope this post gets you started in the wonderful hobby that is bushcraft, I know it can be very daunting trying to figure out where to start, so hopefully this pointed you in the right direction. Remember, one thing at a time. No one became a bushcraft master overnight, Heck I am 6 years in and still learning new things every trip!
This post should also shed light on and shut down the myth that you need all the latest and greatest gear to partake in bushcraft, it’s just not the case. I think at that point, you are kind of getting away from what really makes bushcraft great.
Sure, you need some gear to succeed in bushcraft, but it doesn’t have to break the bank at all.
If you take on the four beginner bushcraft projects I suggested in this post and keep practicing, you will be ready to get into more advanced bushcraft skills in no time. And that is where the real fun begins!
Was this post helpful?

Hey I’m Josh! I have been practicing Bushcraft for a little over 6 years now! I Started this website to review awesome bushcraft gear that I love as well as share information I have learned along the way!