Bushcraft shelters often come down to personal preference, some people like tents, some people like hammocks, some people like building a lean-to. Some types of bushcraft shelters will protect you more than others, and some will have more pros than cons. In this post, I am going to go over the main bushcraft shelter types and what the pros and cons of each are to help you prepare for your wilderness adventure.
4 Proven Bushcraft Shelter Ideas
Bushcraft shelters are the most important thing you can learn about in the world of bushcraft, they are designed to keep you safe and out of the elements. If you don’t know how to build at least one of the many types of bushcraft shelters, you may have a bad time. The 4 primary bushcraft shelter types include:
1. Hammock Shelter
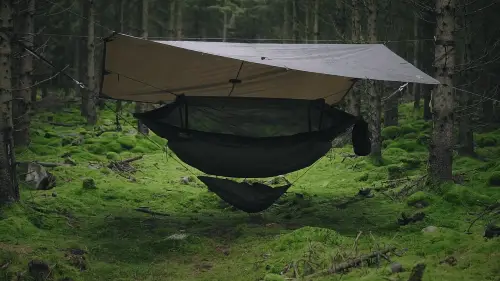
As long as there are trees around, which in the bush is more likely than not, a hammock makes the perfect bushcraft shelter. I was on a bushcraft trip not too long ago and I primarily used my hammock with a tarp strung over top as my shelter, as many choose to do. For me, it’s all about the lightweight and easy setup aspect that keeps me coming back to it.
Let’s be real, sleeping on the ground sometimes sucks, you wake up sore all too often. When you sleep in a hammock, it’s like a cocoon that keeps you warm, dry, and comfortable all night.
The beauty of a hammock shelter is you never need to worry about finding level ground, which can be an absolute pain after a long day hiking in the bush, I don’t need to tell you that. With a proper bug net in addition to your tarp overhead, you don’t have to worry about getting eaten alive by black flies or mosquitos, either. Which is a big bonus.
Some people have the misconception that you can only use a hammock shelter during the warm seasons, but there are actually specially made winter under quilts that will keep you warm in freezing temperatures.
2. Lean-To Bushcraft Shelter
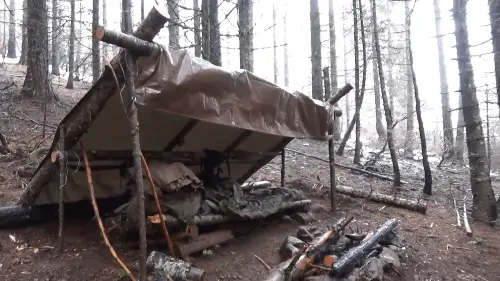
A Lean-To shelter is just as the name suggests, a shelter that is built leaning towards a tree, or rock. These are fairly easy to build shelters and if your plan is to primarily stay in a Lean-To shelter, that will free up some weight and space in your pack not having to carry a tent, hammock, etc.
Lean-To shelters are far more durable than say a tent or a hammock in that they are wind resistant and do not bend or sway with the wind.
You can even build a wall in front of your Lean-To to reflect the heat of your fire back into the shelter to stay warm at night. Be sure to have the proper tools with you that will be required to build a lean-to like your pack axe and a good knife.
But, with advantages come disadvantages. They do require a bit of work if you want to build a fantastic quality Lean-To that can keep you warm and dry.
A Lean-To is heavy on natural materials to ensure it is totally waterproof, which could present a challenge if you are on land that limits the use of natural materials such as branches and logs (crown land).
3. Bushcraft Tarp Shelter
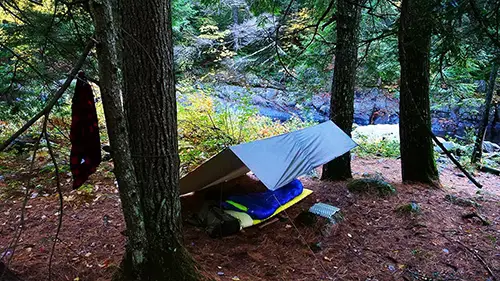
I’ve spoken about bushcraft tarp shelters in various posts before, they are by far the most commonly used shelter in the bushcraft world and also the easiest to set up.
You should always have a tarp with you when out in the bush as part of your bushcraft essentials list, they make shelter construction so much easier. You simply need to find a way to prop the tarp over yourself and have it secured to keep you out of the elements at night.
The neat thing about tarps is that you can build or add on to every shelter listed in this post with one. For example, you could lay your tarp on top of your lean-to for that extra bit of rain protection.
These are a few different types of bushcraft tarp shelters you can build:
Tarp Tipi Shelter
A tarp tipi shelter offers you lots more headroom at the sacrifice of some legroom. Tarp Tipi’s offer great airflow, which helps you wake up dry no matter how much condensation there is outside.
Keep in mind the direction of the wind when setting these up, however, as if it rains at night, the wind could blow all the rain into the open front of your shelter.
A Tarp tipi shelter is fairly simple to set up, you need a ridgeline that will attach to your tie-out point on your tarp and a couple of stakes to secure all sides, which you can easily make!
C Fly Wedge Tarp Shelter
The C Fly wedge gets its name from its shape, as when you set it up it looks kind of like the letter C.
A C-fly wedge shelter offers great protection from the wind on one side, has a floor to keep you off the ground, and offers a good rain runoff.
This is not a complicated shelter to make, but it does require you to have a tree to tree ridgeline, two guylines, and about 6 stakes to secure it.
Plow Point Tarp Shelter
The plow point is a great shelter for all seasons depending on the height of your peak, for colder months it is best to have your peak lower to the ground.
It offers a lot of space which makes it easy to tuck all your gear in at night and offers you wind protection from 3 different angles.
A plow point tarp shelter is possibly one of the quickest tarp shelters to set up, it’s very basic but very efficient.
A frame Tarp Shelter
The a frame tarp shelter is usually my go-to, when I’m not using my hammock. It’s quick and easy to set up and offers some pretty decent protection from wind, rain, and snow.
The angle of the a frame tarp shelter makes it easy for snow and rain to run off the tarp to not build up and become a problem.
For an a frame tarp shelter, you will need some paracord for your ridgeline, a tarp of course, and 4 stakes.
Be sure to keep your guy line tight to prevent sagging.
4. Bushcraft Tent
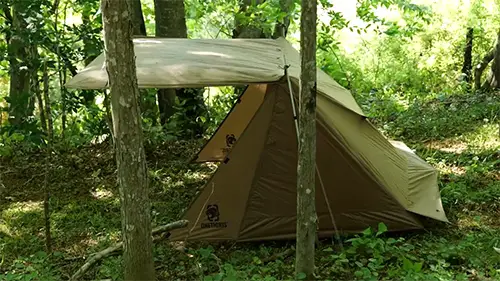
Tents offer something most other shelters here don’t, full enclosure and escape from the elements, but, at the sacrifice of price and sometimes, weight. A tent will keep you dry, warm, and safe.
A good tent will offer you more protection from bugs, both the flying and ground kinds. Which is always a bonus, nothing is worse than waking up to a new friend crawling on your face!
Some tents may be heavier than others and weigh you down, however, these days companies are turning out new lightweight tents all the time that can easily fit in your pack. So weight depending on the tent, may not be as big of an issue as it once was.
The main issue with a tent is trying to find flat ground to set up on, as I’m sure I don’t have to tell you it is not always easy to find a smooth flat surface in the middle of the bush. Also, depending on the tent they can take a while to set up.
If it rains, a tent does tend to take much longer to dry than your average tarp. Which can be a pain to deal with on extraction day.
Best Option for a Winter Bushcraft Shelter
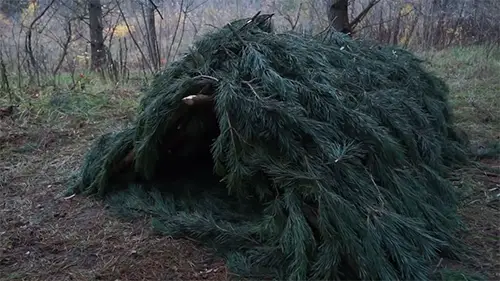
In the winter priorities for shelter in the wilderness change, you sacrifice speed and efficiency of set up to be sure your shelter is made right, to keep the cold out. Your winter bushcraft shelter can literally mean life or death in the bush.
In my opinion, the best shelter for bushcraft in the winter is a debris hut. Debris huts can be SUPER insulated which is something you really need to take into consideration when building winter bushcraft shelters.
Debris huts are made from using sticks and available debris in the area (hence the name) such as leaves, ferns, bark, moss, spruce bows, etc.
The beauty of building a debris hut is that you can use literally anything around you. If you have spruce trees around, even better as those offer some of the best insolation in the wintertime.
Conclusion
So there you have it, the 4 proven bushcraft shelters you should now. Well, 8 if you include the 4 different types of tarp shelters I showed you.
The shelter is the first thing other than maybe fire you should have on your mind in the wilderness, it can be the difference between a fun experience or a miserable time.
Shelter doesn’t have to be a pain to set up, but you want to be sure you are setting up properly to avoid your shelter coming down on you in the middle of the night.
Did I miss any bushcraft shelters you think should be listed here, or have any questions? Feel free to comment below!
Was this post helpful?
Hey I’m Josh! I have been practicing Bushcraft for a little over 6 years now! I Started this website to review awesome bushcraft gear that I love as well as share information I have learned along the way!


